How to make a bow… a step-by-step tutorial.
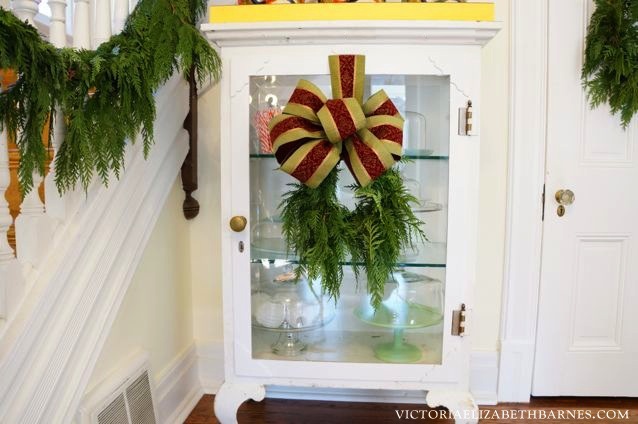
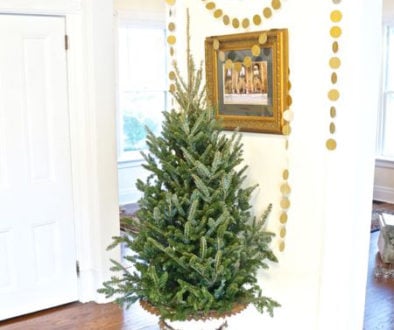
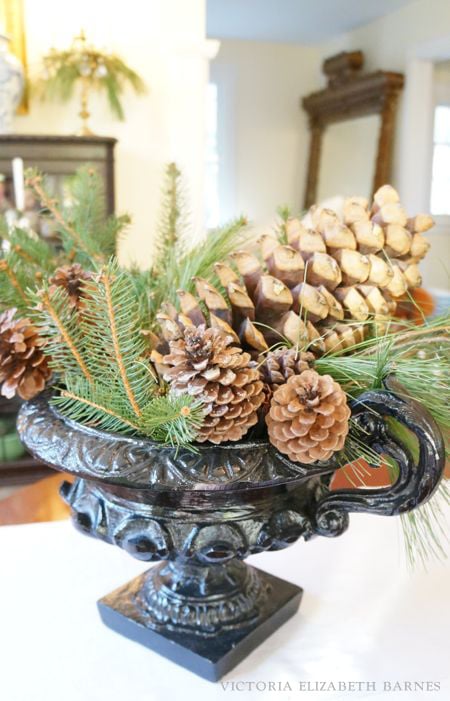
take the full holiday house tour here!
My mother is a cross between Martha Stewart and the set-design-team for a 1940’s Hollywood musical: creative.
If you said to my mother— look, tomorrow I’m having three-hundred people to my house for Christmas… and I didn’t plan at all… and all I have is this loaf of bread and some glitter… You would get the glitteriest, sparkliest, most-spectacular loaf of bread you can imagine.
People wouldn’t even care that they couldn’t eat it because it would be so magnificent.

Sadly for me, I did not inherit her talents… It’s not just that I lack technical skill, it’s that I lack patience. My irritation-indicator kicks in precisely at five minutes of frustration.
However. There is one crafty thing that even I can handle: making a bow.
My mother can do it one-handed, while also juggling knives and flamethrowers.
But we’re just going to use both our hands. And maybe a stapler if things get out of control.
Apparently, you can buy something called a bowdabra which will make all your bows perfect and amazing, but let’s assume you’re like me and enjoy doing everything the hard way.
You need next-to-no supplies. I mean, you need ribbon. But hopefully, that’s self-explanatory. And you need a thin but sturdy piece of wire. I use floral wire. You could also use string if you have someone to tie it for you. Or just staple it into submission.
So, get some giant ribbon.
You can also get non-giant ribbon… I don’t know why you would, but this is a free country. Get whatever ribbon speaks to you. But make sure it’s wired on the edges.
People keep asking me where they can buy it… this extra-wide ribbon is the closest I found online.
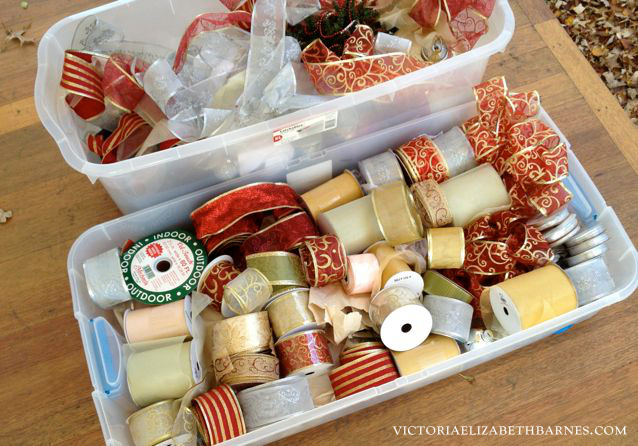
If you’re like me, you already have a massive bin of ribbon.
All of which has just revealed itself to be undeniably hideous and unusable. And you will have to go to your craft store and buy new ribbon. That’s understandable. Just make sure it’s wired.
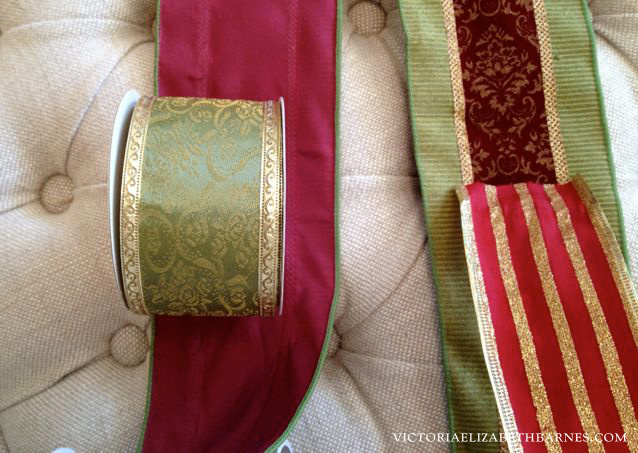
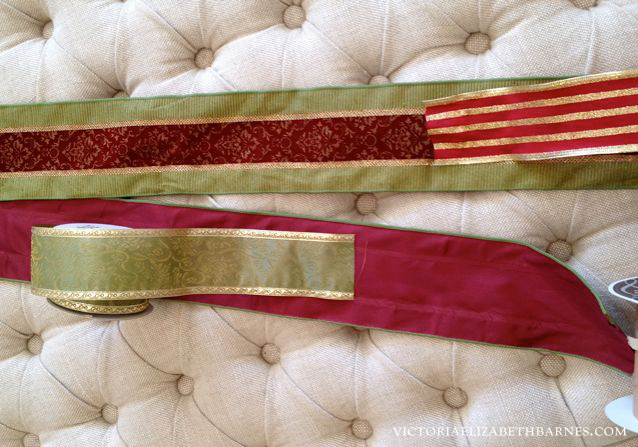
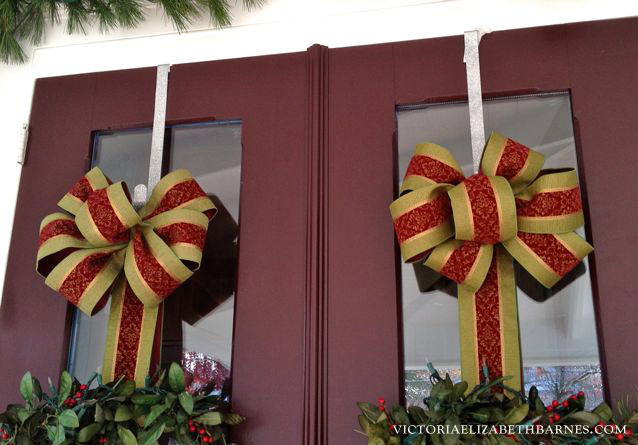
The ribbon I’m using this year is extra wide. Four inches, compared to regular holiday ribbon, which is usually 2.5 inches wide…
The regular ribbon will still give you a beautiful bow, and it’s what I usually use. But this extra-wide stuff is lined in red on the reverse side which I LOVE.
And I am nothing, if not the sort of person whose brain is clogged with these kinds of minuscule details that are both irrelevant and of the utmost consequence.
If you want to get extra fancy… you can add some wired, battery powered fairy lights to the bow. This is extra nice for a front-door wreath or tree topper.
Depending on the size of the bow you want, and how many loops you want it to have, and how many bows you want to make… you may need a couple of spools of ribbon.
If you don’t know the advanced-mathematical Fourier Analysis formula for the trigonometry involved in calculating this? I would advise you to get more ribbon than you think you need.
Or, if you’re like me, you can skip this step, run out of ribbon, drive back to A.C. Moore, realize that actually, you got it at Michaels, drive to Michaels, find they’re all sold out…
Obviously, no other ribbon will do.
Drive home. Call other Michaels, find out no one in a thirty-mile radius has it. Call your mother’s Michaels, then call your mother and ask her to go get it. Ask her to mail it to you. Be sure she uses priority mail because the Internet is waiting with bated breath for your über-stimulating post on DIY holiday bow-making.
HOW TO MAKE A BOW
STEP ONE:
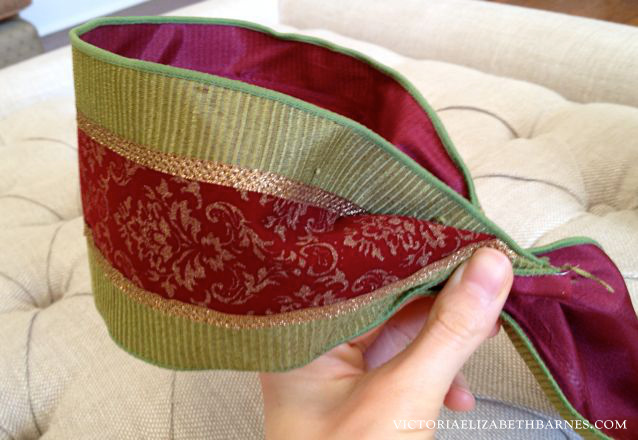
Take your ribbon’s end piece. Make a loop that’s the largest size you want. Pinch and twist the ends together so it’s narrow. Here, you can cheat and staple that center bit together if you’re ready to commit to that size loop. Or, if you get the hang of it, you can just hold it together with your hand and at the end, we will wrap the center tightly with some floral wire.
The key to a good-looking bow is to get the center really scrunchy. If the center is as wide as the loops, it’s not a bow, it’s a pile of ribbon.
STEP TWO:
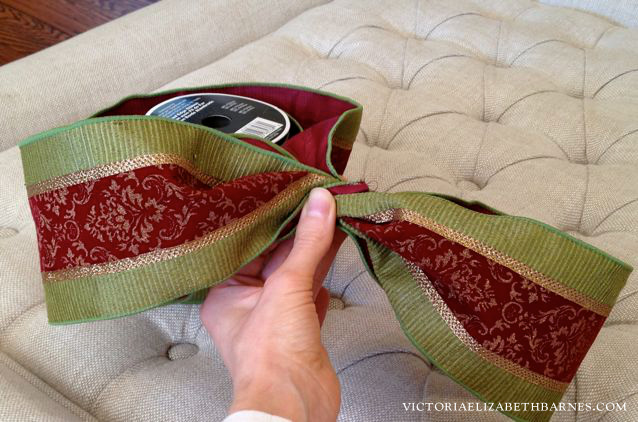
Make another equal-size loop on the opposite side. Pinch and twist. Again, you can staple to hold it secure. There is no shame in this. For years, my bows were full of staples in the center. We’re going to cover whatever mess you make there in the middle, so it doesn’t matter what it looks like.
At this point, with the two largest loops, you can go view it against your wreath or banister or front door… This will help you make sure that you’re happy with the size, in relation to the space. Or, if this is supposed to match another bow, compare with that for size.
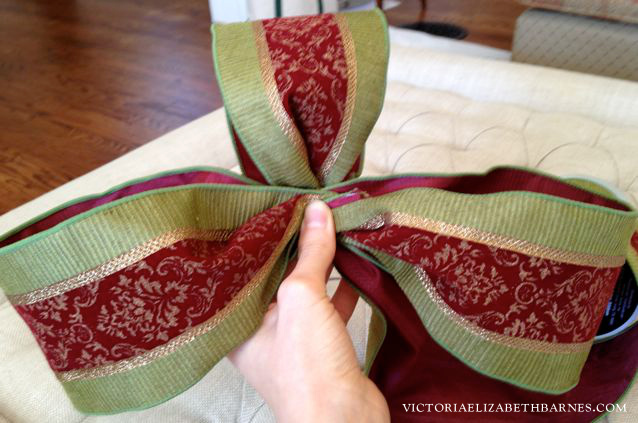
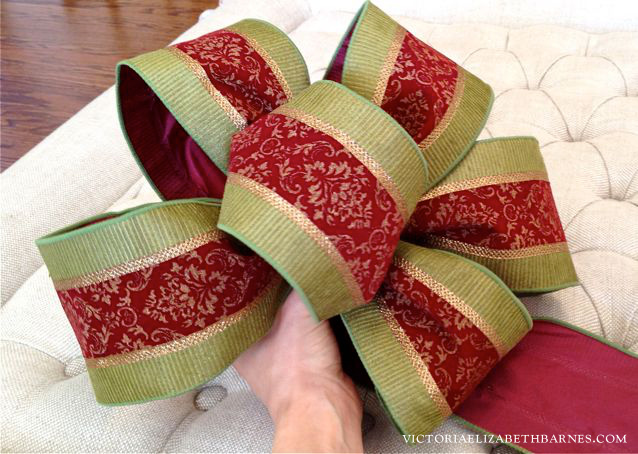
Keep going with the loops. Alternate their placement, making loops that are somewhat opposite each other. Work around in whatever shape you want it to have. If you want it to be circular, with loops all around, or if you want it to actually keep a traditional bow shape but more dramatic, you can layer the loops on top of each other.
I’m making a really large bow, and it’s going to eat three yards of ribbon… Depending on the size of the bow you want and the ribbon you’re working with, you may need more loops or ribbon.
You will ABSOLUTELY have to do this a few times to get the hang of it.
At some point soon, you will want to throw it out the window– it’s an important part of the process… just keep going.
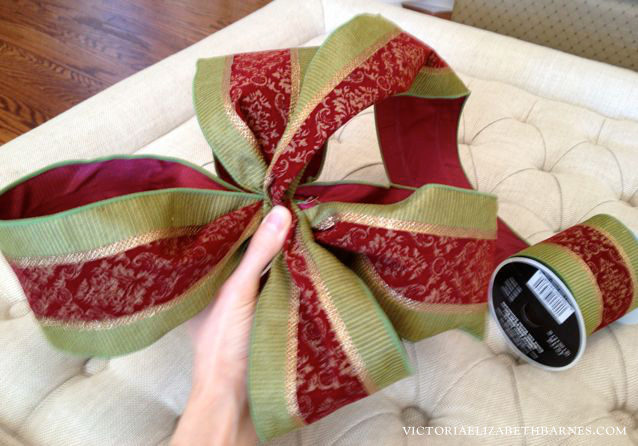
STEP THREE:
When you have all the loops you want. Or are in danger of losing control, it’s time to put a final loop in the center.
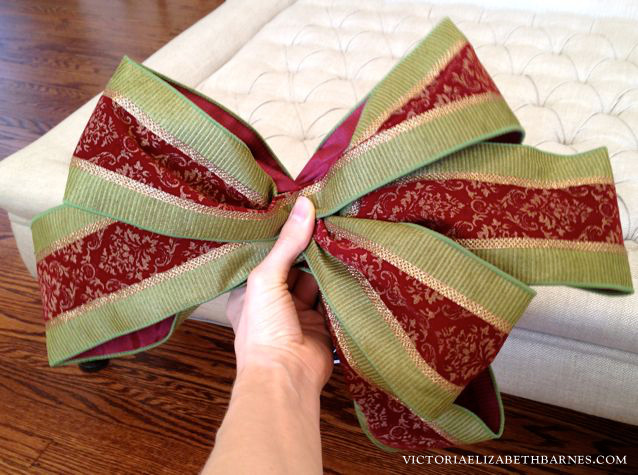
STEP FOUR:
Fasten the center. I use floral wire, which is thin but sturdy. And it’s coated in dark green so it tends to blend in with most Christmas stuff… wrap it TIGHTLY around the center where your hand is holding all the ribbon together. You want to keep the center narrow and secure– make a couple passes around the center with the wire. Leave enough spare wire to fasten the bow to whatever wreath, door, banister, or gift you’re using it on.
If you don’t have wire? Or if you feel that your bow has gotten rowdy and unpredictable—you can just shove your stapler in there and go to town.
This has the double solution of securing it and making you feel like you have exerted dominance over that which has irritated you.
Don’t worry about keeping the shape of the bow. Once it’s really tight in the center, you can pull the loops around to wherever you want them.
INTERMISSION:
At this point, I would like to offer the disclaimer that I am aware you don’t care this much about bows, or ribbon. Or DIY crafts in general. But I am unable to stop myself from continuing.
I’m sorry.
I am like this in person too— unable to substitute a brief overview, if a lengthy and detailed explanation is available to bore you.
END INTERMISSION.
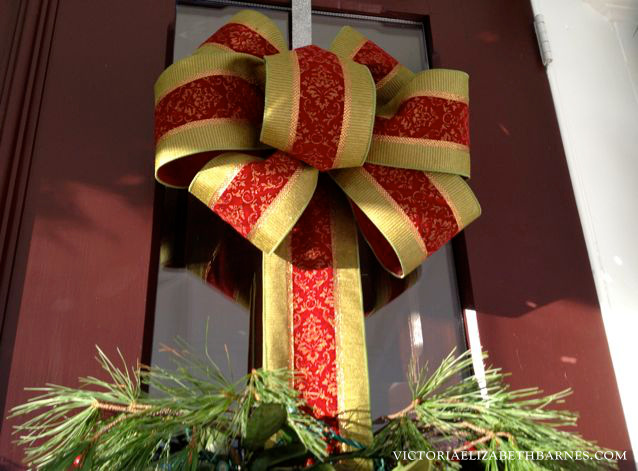
STEP FIVE:
Once you hang it, it’s time to really get in there and rearrange the loops. That’s what the wired ribbon is for— to hold it in the shape you want. Like Spanx, for your bow.
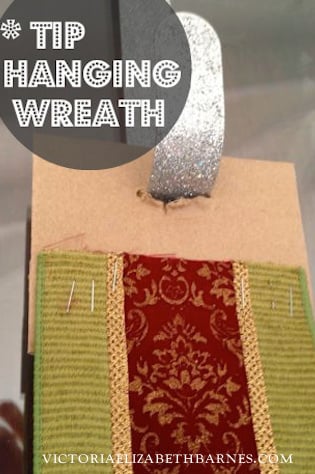
STEP SIX:
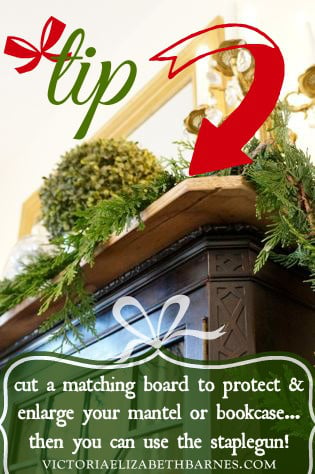
If you want to hang your wreath from matching ribbon, on a wreath hanger, you can still keep the ribbon flat by stapling the loose ribbon ends to a thick piece of cardboard, and then sliding the cardboard over the wreath-hanger’s end.
The cardboard keeps the ribbon at its full width, rather than bunched up at the hook… and the cardboard is going to be covered by your bow.
CONCLUSION: Critical Theory of Bow Making.
Now I give you the ultimate secret of bow-making:
Accept the bow you have made.
There is a fine line between perfect bow-ness and the point at which you rip it apart, start over, and then three attempts down the line realize that the first bow of the day was actually the grail of bows, and now you will never recapture it.
Yes, you will absolutely need to practice this before you get a really great bow… But at some point, you are going to think: it’s ALMOST right. I’ll do it again.
Just one more time.
DON’T DO IT. Almost is as good as you get.
This is essentially what Kenny Rodgers has been trying to tell us—know when to hold it, know when to fold it— a song mistakenly interpreted to be about gambling and the meaning of life… but actually about the challenges of Christmas décor.

September 11, 2018 @ 5:54 pm
Thank you for making this tutorial! I have a feeling making a bow like this is something that probably comes more or less naturally to most women, but for some reason as a guy I’m just not good at crafty stuff like this… so having a step by step tutorial helps a lot 🙂
February 26, 2019 @ 1:16 pm
Rest assured I’m not a psycho crazy stalker or anything weird I promise lol! However after reading your post about your mother I WANT TO BE UR MOTHER!! LOL I CAN ONLY HOPE TO BE HALF THE AMAZING WOMEN SHE SOUNDS TO BE🥰😍🤗💕 thank you 🙏🏻 so very much for this bow love it!
October 27, 2019 @ 1:09 pm
You are so funny. I love your sense of humor and your bow making skills with the stapler. Just a thought, but I really like the long zip ties for the center of my bows and you can tighten them very well. Just a thought.😁
November 15, 2019 @ 3:12 am
Useful Content. Thanks a lot for the info!
December 4, 2019 @ 7:14 pm
I found myself laughing and thinking this person is my twin because you just don’t know how many times I have tried to tie a bow. I need to tell you the stapler advise was genius. I can tie the bow and I really enjoyed the tutorial. Thank you!!!
December 5, 2019 @ 6:27 am
Waao, I love it. It looks huge but mesmerizing. It goes perfectly with the wreath. I can use this to put on my outside door. People are saying it is weird but it is great for big decoration on to put on something which is big enough to hold this bow.
Good Luck!
December 6, 2019 @ 2:33 pm
Personally, I think your blog is a cleverly disguised humor post, interspersed with directions on making decorator bows. A most excellent piece of writing. 🙂
December 23, 2019 @ 12:30 pm
I too have so much of that red-with-gold-scrolls ribbon in my ribbon bin. Why do we have so much? Was it on sale? In an effort to use up some of what I have, I plan to use it on my wreaths. Yes, it’s 2 days until Christmas and my wreaths aren’t up but I keep looking at that ribbon and…ugh! Maybe if I make a fancy bow like this it will be okay.
Thanks for the tutorial and merry Christmas!
September 11, 2020 @ 5:43 am
What a wonderful writer you are. I started skimming the post looking for the actual instructions since you’re right, I care very little about bows and just have this one I want to do; realised that the useful stuff is embedded among oddly lengthy rambling, had to focus a little more and woah! Victoria Elizabeth Barnes, you’re a delight. I am now sending this to a select few of my friends who will properly appreciate it (on a minimum of three levels).
November 18, 2022 @ 10:53 am
I thought your post on bow making was easy to read and understand, but then again, I’m a life long now maker!
I would suggest adding how much ribbon is needed. 2 spools tells me nothing as some have 3 feet and some have 10 yards. Honestly, I’ve never measured how much I use. I just work from 10 yard spools, so Im guessing I use around 10 feet per bow.
November 28, 2023 @ 9:44 am
Well, you saved me my sanity.
Just when I was about to throw the pretty ribbon I bought out the window I came to your website
Not only did I learn how to make a decent enough ribbon for the first time, minus stapling it to my kitchen table, but it was really fun.
Thank you for helping this German woman making ribbons and more!!!