How to make a bow… a step-by-step tutorial.
take the full holiday house tour here!
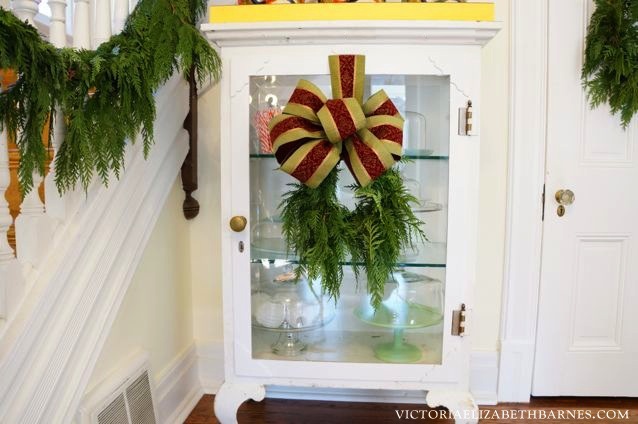
My mother is a cross between Martha Stewart and the set-design-team for a 1940’s Hollywood musical: creative.
If you said to my mother— look, tomorrow I’m having three-hundred people to my house for Christmas… and I didn’t plan at all… and all I have is this loaf of bread and some glitter… You would get the glitteriest, sparkliest, most-spectacular loaf of bread you can imagine.
People wouldn’t even care that they couldn’t eat it because it would be so magnificent.
Sadly for me, I did not inherit her talents… It’s not just that I lack technical skill, it’s that I lack patience. My irritation-indicator kicks in precisely at five minutes of frustration.
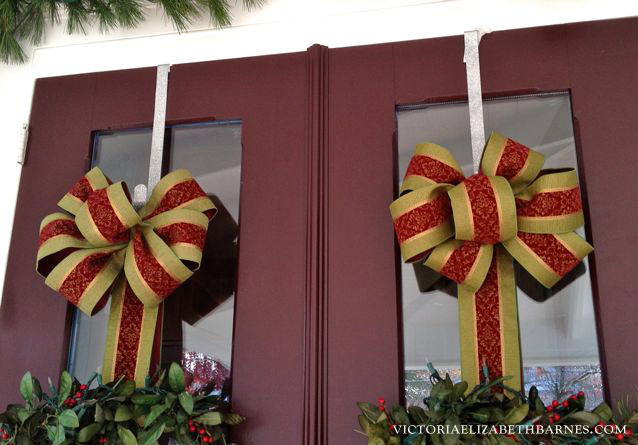
However. There is one crafty thing that even I can handle: making a bow.
My mother can do it one-handed, while also juggling knives and flamethrowers.
But we’re just going to use both our hands. And maybe a stapler if things get out of control.
Apparently, you can buy something called a bowdabra which will make all your bows perfect and amazing, but let’s assume you’re like me and enjoy doing everything the hard way.
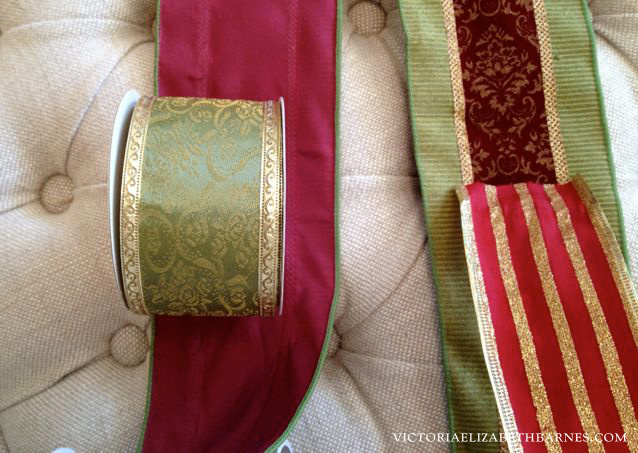
You need next-to-no supplies. I mean, you need ribbon. But hopefully, that’s self-explanatory. And you need a thin but sturdy piece of wire. I use floral wire. You could also use string if you have someone to tie it for you. Or just staple it into submission.
So, get some giant ribbon.
You can also get non-giant ribbon… I don’t know why you would, but this is a free country. Get whatever ribbon speaks to you. But make sure it’s wired on the edges.
People keep asking me where they can buy it… this extra-wide ribbon is the closest I found online.
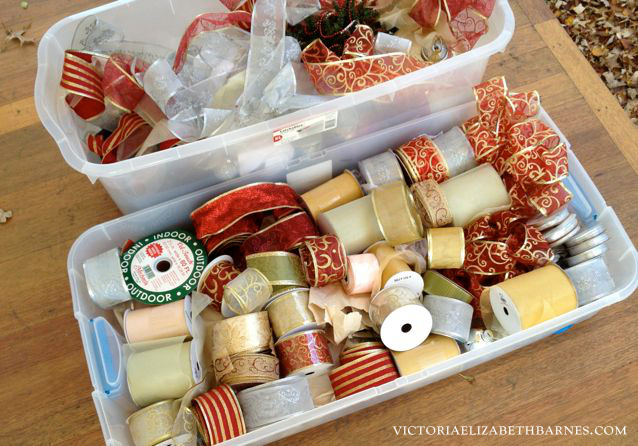
If you’re like me, you already have a massive bin of ribbon.
All of which has just revealed itself to be undeniably hideous and unusable. And you will have to go to your craft store and buy new ribbon. That’s understandable. Just make sure it’s wired.
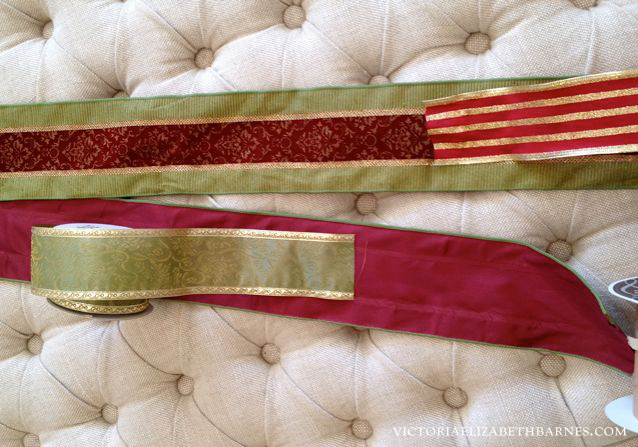
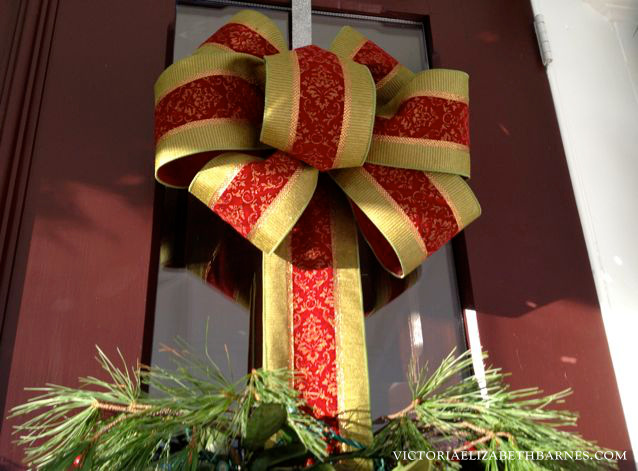
The ribbon I’m using this year is extra wide. Four inches, compared to regular holiday ribbon, which is usually 2.5 inches wide…
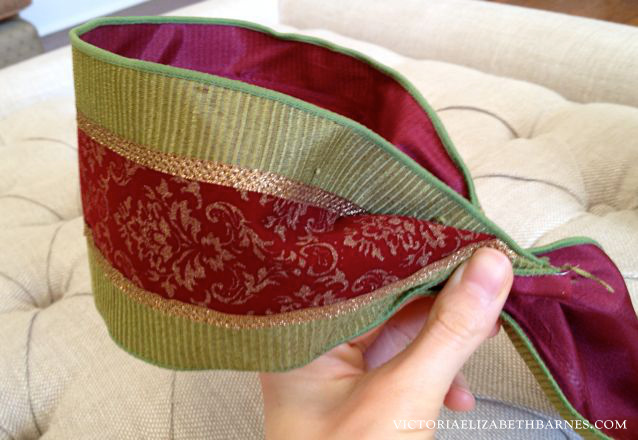
The regular ribbon will still give you a beautiful bow, and it’s what I usually use. But this extra-wide stuff is lined in red on the reverse side which I LOVE.
And I am nothing, if not the sort of person whose brain is clogged with these kinds of minuscule details that are both irrelevant and of the utmost consequence.
If you want to get extra fancy… you can add some wired, battery powered fairy lights to the bow. This is extra nice for a front-door wreath or tree topper.
Depending on the size of the bow you want, and how many loops you want it to have, and how many bows you want to make… you may need a couple of spools of ribbon.
If you don’t know the advanced-mathematical Fourier Analysis formula for the trigonometry involved in calculating this? I would advise you to get more ribbon than you think you need.
Or, if you’re like me, you can skip this step, run out of ribbon, drive back to A.C. Moore, realize that actually, you got it at Michaels, drive to Michaels, find they’re all sold out…
Obviously, no other ribbon will do.
Drive home. Call other Michaels, find out no one in a thirty-mile radius has it. Call your mother’s Michaels, then call your mother and ask her to go get it. Ask her to mail it to you. Be sure she uses priority mail because the Internet is waiting with bated breath for your über-stimulating post on DIY holiday bow-making.
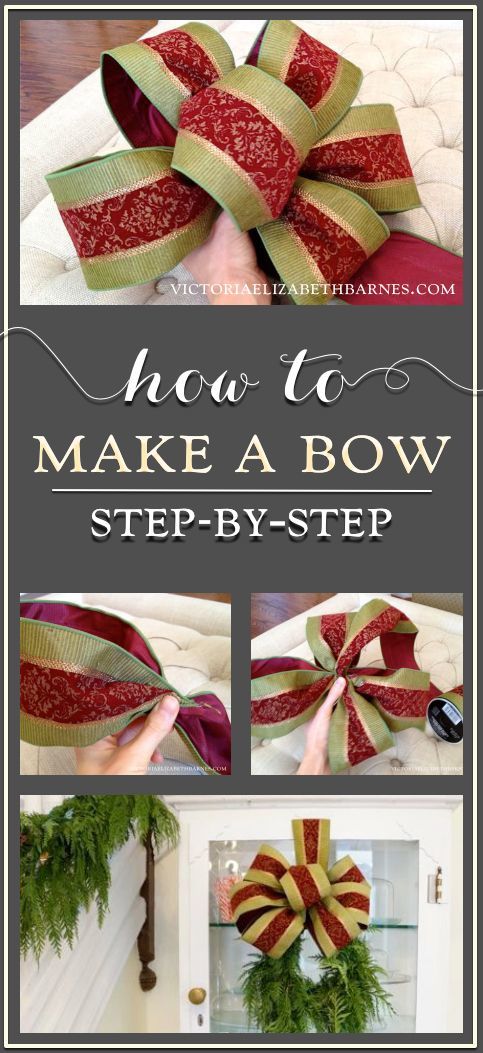
HOW TO MAKE A BOW
STEP ONE:
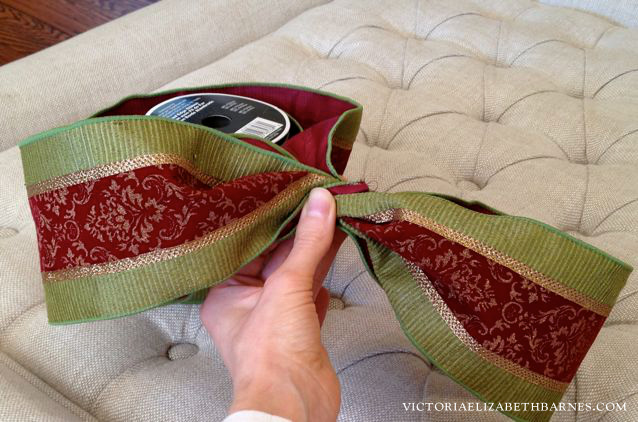
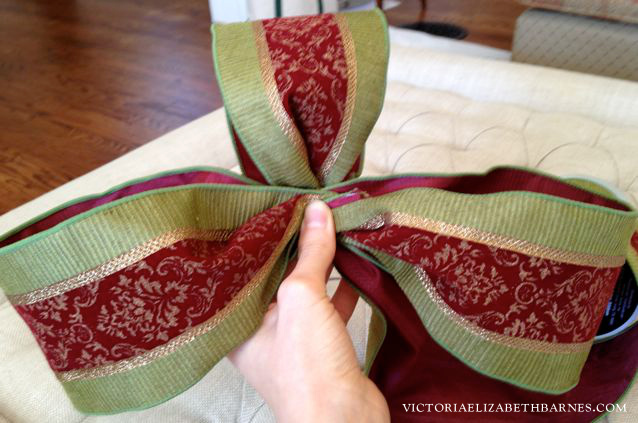
Take your ribbon’s end piece. Make a loop that’s the largest size you want. Pinch and twist the ends together so it’s narrow. Here, you can cheat and staple that center bit together if you’re ready to commit to that size loop. Or, if you get the hang of it, you can just hold it together with your hand and at the end, we will wrap the center tightly with some floral wire.
The key to a good-looking bow is to get the center really scrunchy. If the center is as wide as the loops, it’s not a bow, it’s a pile of ribbon.
STEP TWO:
Make another equal-size loop on the opposite side. Pinch and twist. Again, you can staple to hold it secure. There is no shame in this. For years, my bows were full of staples in the center. We’re going to cover whatever mess you make there in the middle, so it doesn’t matter what it looks like.
At this point, with the two largest loops, you can go view it against your wreath or banister or front door… This will help you make sure that you’re happy with the size, in relation to the space. Or, if this is supposed to match another bow, compare with that for size.
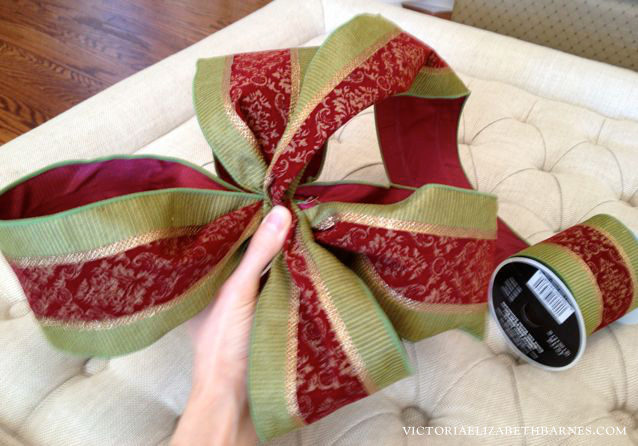
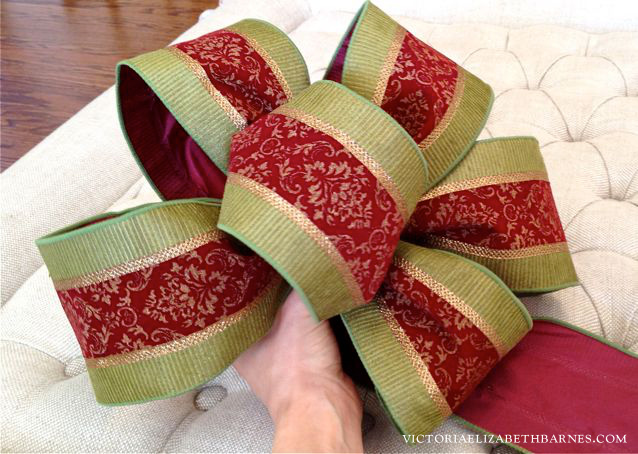
Keep going with the loops. Alternate their placement, making loops that are somewhat opposite each other. Work around in whatever shape you want it to have. If you want it to be circular, with loops all around, or if you want it to actually keep a traditional bow shape but more dramatic, you can layer the loops on top of each other.
I’m making a really large bow, and it’s going to eat three yards of ribbon… Depending on the size of the bow you want and the ribbon you’re working with, you may need more loops or ribbon.
You will ABSOLUTELY have to do this a few times to get the hang of it.
At some point soon, you will want to throw it out the window– it’s an important part of the process… just keep going.
STEP THREE:
When you have all the loops you want. Or are in danger of losing control, it’s time to put a final loop in the center.
STEP FOUR:
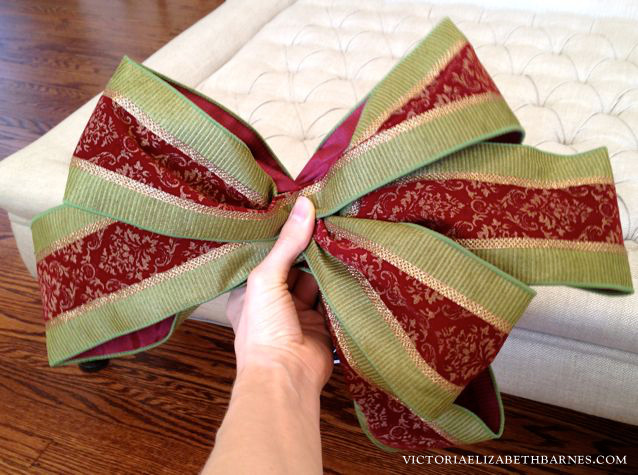
Fasten the center. I use floral wire, which is thin but sturdy. And it’s coated in dark green so it tends to blend in with most Christmas stuff… wrap it TIGHTLY around the center where your hand is holding all the ribbon together. You want to keep the center narrow and secure– make a couple passes around the center with the wire. Leave enough spare wire to fasten the bow to whatever wreath, door, banister, or gift you’re using it on.
If you don’t have wire? Or if you feel that your bow has gotten rowdy and unpredictable—you can just shove your stapler in there and go to town.
This has the double solution of securing it and making you feel like you have exerted dominance over that which has irritated you.
Don’t worry about keeping the shape of the bow. Once it’s really tight in the center, you can pull the loops around to wherever you want them.
INTERMISSION:
At this point, I would like to offer the disclaimer that I am aware you don’t care this much about bows, or ribbon. Or DIY crafts in general. But I am unable to stop myself from continuing.
I’m sorry.
I am like this in person too— unable to substitute a brief overview, if a lengthy and detailed explanation is available to bore you.
END INTERMISSION.
STEP FIVE:
Once you hang it, it’s time to really get in there and rearrange the loops. That’s what the wired ribbon is for— to hold it in the shape you want. Like Spanx, for your bow.
STEP SIX:
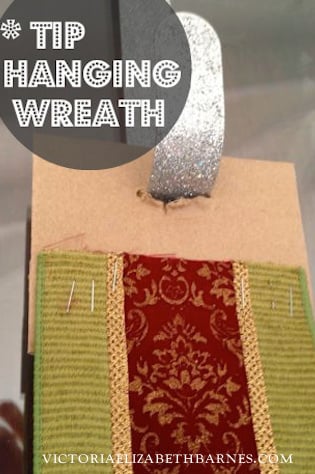
If you want to hang your wreath from matching ribbon, on a wreath hanger, you can still keep the ribbon flat by stapling the loose ribbon ends to a thick piece of cardboard, and then sliding the cardboard over the wreath-hanger’s end.
The cardboard keeps the ribbon at its full width, rather than bunched up at the hook… and the cardboard is going to be covered by your bow.
CONCLUSION: Critical Theory of Bow Making.
Now I give you the ultimate secret of bow-making:
Accept the bow you have made.
There is a fine line between perfect bow-ness and the point at which you rip it apart, start over, and then three attempts down the line realize that the first bow of the day was actually the grail of bows, and now you will never recapture it.
Yes, you will absolutely need to practice this before you get a really great bow… But at some point, you are going to think: it’s ALMOST right. I’ll do it again.
Just one more time.
DON’T DO IT. Almost is as good as you get.
This is essentially what Kenny Rodgers has been trying to tell us—know when to hold it, know when to fold it— a song mistakenly interpreted to be about gambling and the meaning of life… but actually about the challenges of Christmas décor.
December 4, 2016 @ 10:54 pm
Ok…I love the banter! Just keep doing what you do best! Thank you!
December 9, 2016 @ 7:53 pm
Loved the post .. and although I know how to make bows I like to check out other people’s techniques !
You SHOULD have a show , I was laughing so hard at your instructions .., because every word was so true ! I said ,thought and did everything u quoted !!!!
Keep up the good work !
December 23, 2016 @ 9:39 am
Every time I read your posts I’m certain that we are sisters, separated by some obscure time/space continuum. I am in the midst of downsizing my stuff and trying to pare down to the bare necessities with a more mid-modern aesthetic these days, but love your style, nevertheless. Your tale of finding/buying/looking for the perfect ribbon is the story of my life! I do that with just about everything. My mom lives almost 1000 miles away and I have definitely searched for things in her zip code or a 100 mile radius and have implored her to get it for me. I thought I was the only one. My husband’s motto is “a bird in the hand” so I’ve been trying to adopt that, but now I’ve wound up with a lot of bags of miscellaneous items that need to be returned to about a hundred different locations. Guess who is going to be in charge of that?
January 22, 2017 @ 9:38 pm
I usually never comment on blogs, but I was roaring reading this one! Thanks for making me laugh, I needed it.
September 3, 2017 @ 1:23 pm
You may not have the same crafty expertise as your Mother, but you can probably.kick her booty in wit and humor! Love your writing style AND your bows. Lol
October 15, 2017 @ 9:29 pm
I have to tell you…..I enjoyed your commentary much more than the advice on bow making. Don’t get me wrong! I loved the bow and as a person who makes millions of bows for the millions of wreaths,floral arrangements and decor I make I know how to appreciate a bow and a bow tutorial! Please overlook my tendency to exaggerate…..I’m just built that way.
I too have gone thru the many frustrating attempts only to end up with something worse than the first….lol
I just couldn’t leave without telling you how much I enjoyed reading this post and I can’t wait to read more!
I spent the first 45 years of my life unable to make anything worth showing off. I was not a crafty person at all. One day however I just decided I was going to do it because I needed the income I saw other people making with the fruits of their labor. Problem is like everything I do, I’m a perfectionist. This means I work much harder and longer than most for the end product…lol. But I do it, as I have come to enjoy it very much once I get started.
Thanks for your post andand for taking the time to read my babble.:-)
Brie
November 9, 2017 @ 11:27 am
Super simple directions made this fun and easy, once my fingers decided to cooperate. My boss asked for a Christmas bow for her planter, searched “step-by-step Christmas Bow” and wound up here. The first one I made was HUGE, like monster-big compared to the plant it was supposed to adorn, so I scrunched the poor thing up in the middle and it totally works! Plus, my boss loves it! Hooray!
November 14, 2017 @ 5:40 pm
I almost never subscribe to blogs, but I like you. So, there you go!
November 18, 2017 @ 8:21 pm
This is cute, but you were so busy being funny, I couldn’t find a how to on the center loop. Gonna guess 😢
November 24, 2017 @ 11:20 pm
Really great article. I enjoyed reading and laughing as I learned about bow making!
November 28, 2017 @ 9:25 am
This is the absolute best tutorial of bow making I have seen! Thank you!!! Merry Christmas 🎀🎀
December 3, 2017 @ 3:59 pm
Very nicely done! Your tutorial is great. It has been a number of years since I’ve made bows (back during my wreath decorating state), but I have bins and bins of all kinds of ribbons. Use a lot of the smaller width ribbons for decorating my home made greeting cards.
December 3, 2017 @ 4:39 pm
I subscribed because at the end of your tutorial I was smiling from ear to ear. Your sense of humor is simply infectious and your instructions are wonderfully clear. Thank you soo much. Huge huge hug.
December 5, 2017 @ 12:51 am
I needed this today! I bought festive bags on sale in October and have decided they need bows.
The urge to throw them out the window is part of the process…… toooooooo funny! Clearly, you have seen me crafting.
Thank you for this timely and hilarious write-up!
December 5, 2017 @ 12:01 pm
You are hilarious and magical. A Keebler elf on speed and too many cookies as raised by Bunny Mellon and Elsa Schiaparelli. I wish you lived next door. You could borrow wired ribbon and double sided tape any time. Thank you for your inspired and insane projects. Your house is gorgeous and Paul should be canonized. Merry Christmas! I am going to make my giant bow out of 8 inch leopard ribbon. Pray that I don’t strangle myself or my (similarly saintly as Paul) husband.
December 10, 2017 @ 9:32 pm
You are hysterically funny. You remind me of how I think! Not to mention I totally know how to follow your bow instructions!!
Thanks for the laugh and my awesome bow!
darla
December 14, 2017 @ 10:09 am
So, do you own a serger (a.k.a. overlocker) machine by any chance? Just wanted to let you know that you can turn any plain giant fancy ribbon into wired ribbon with a serger, and you can even make your own wired ribbon from any fabric your heart desires with a serger, you just serge a rolled hem along the edges of ribbon or fabric strips while the thin wire feeds between the thread and the fabric. Like in this video: https://www.youtube.com/watch?v=IlqjaNxRIDM . It sews so much faster than a regular sewing machine and you can make yards and yards of custom ribbons and trims in minutes.
Tell Paul you want a serger for Christmas if you don’t already have one. Someone as fancy as you deserves to have unique, custom ribbon bows and limitless DIY decorating possibilities. Also M&J Trimmings is a fabulous online resource for ribbons, and their ribbons are 20% off right now: https://www.mjtrim.com/.
December 22, 2017 @ 4:32 pm
Interesting Post. Thanks! 🙂
January 22, 2018 @ 7:22 am
Your personality is absolutely wonderful and hilarious! You made this tutorial so relatable and funny. I feel so much more confident now to go start making my bows. Your Mother should be proud, you may think you don’t have talent, but i think youll find that your quite talented afterall. I wish i could read more of anyrhing you had to say. Xoxo
April 22, 2018 @ 4:48 pm
Lady, you are a hoot! This was as much fun to read as it was about learning. Entertaining as well as informative. Thank you.