Piano into kitchen island– designing drawers and storage. *video*
if you’re new to the piano, start here! This is part 6… here is: part one, two, three, four, five, seven
If you don’t want to read all of my precious words, skip to the video at the end. It explains this entire post in fifty seconds.
BUILDING DRAWERS / PROJECT OVERVIEW:
1. Considering the piano’s structure.
2. Designing the drawers.
3. Storage inside the piano.
4. Storage under the piano.
1. Considering the piano’s structure.
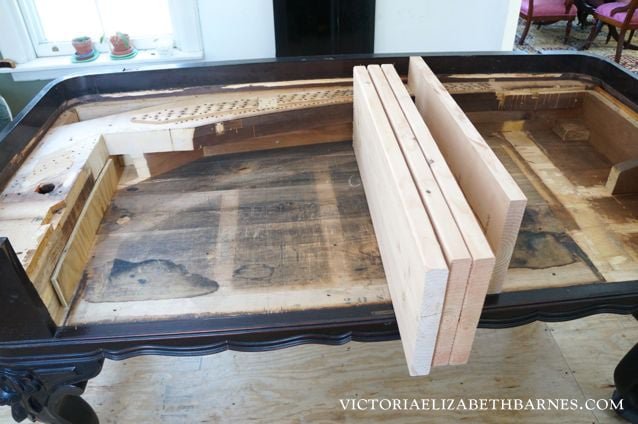
The piano is not just a flimsy shell… it has a thick, curved wood piece called the pinblock: it supported the harp and acted as an attachment for the strings.
In the photo below, in the left/back corner, (where the curve is most prominent,) we notched out one part to get the corner of a drawer a little bit further in.
Cutting the pinblock out entirely would give us more drawer space, but for what we want to do (top the piano with marble,) structurally, that curved piece is important.
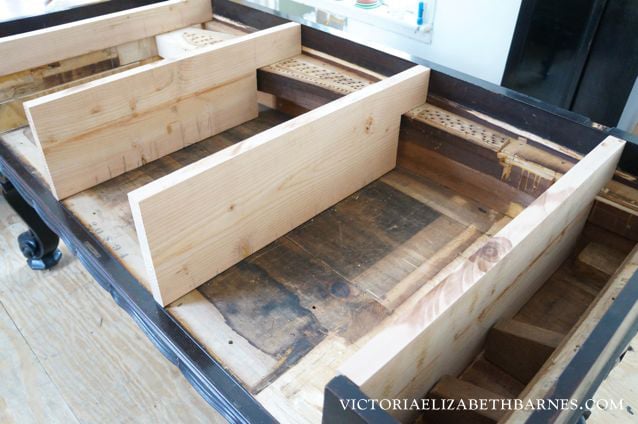
We are going to make the marble-supports perfectly flush with the very top edge of the piano (we want the original piano sides to appear to support the marble because I’m not sure I’ll want an overhang). We will leave the elevated pinblock and notch the marble-supports to sit on top.
These boards will also act as drawer dividers/drawer slide holders.
2. Designing the drawers: STORAGE.
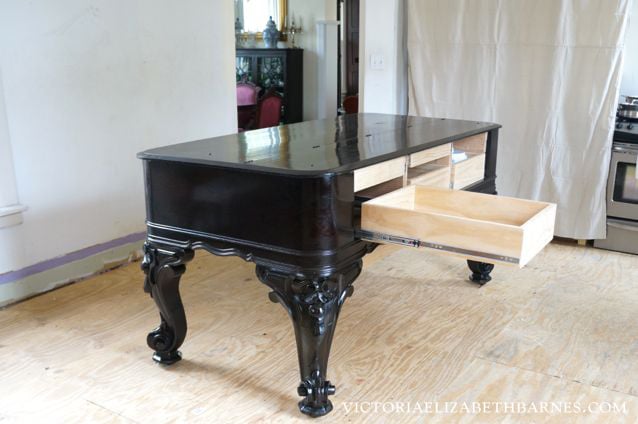
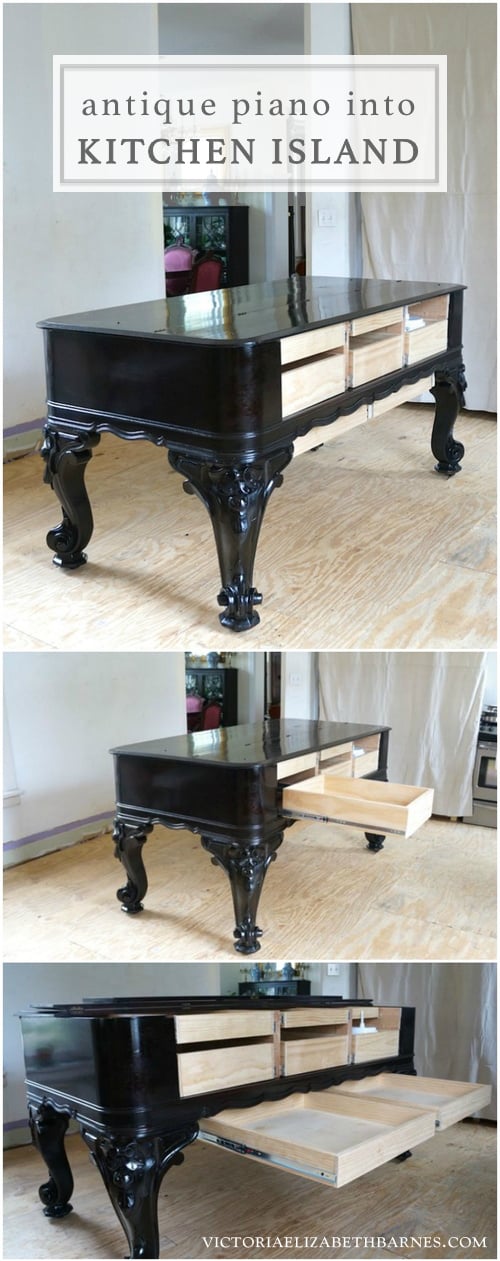
We are going to have two tiers of drawers, but only one drawer face for each tier.
Weighing out functionality vs. appearance, three drawer-faces will look better than six, and the upper drawers will hold what is related to the lower drawers – attachments, etc. So I will be opening the lower drawer anyway.
Because I am trying to make decisions based on preserving the furniture-ness of the piano, I considered simply keeping the original keyboard cover (now-drawer-face) intact, and having the entire piece hinge up, or out, or somewhere, but every configuration I considered seemed like a lot of extra steps simply to open a drawer.
2. Designing the drawers: HARDWARE.
You can see that our drawers still need finished drawer fronts, which cannot be installed until I get handles, which I cannot buy until I find something I like.
I have been looking on eBay, and did the rounds of the salvage places, but anything I like is only a set of two. And I need at least three. (Or five, if we do the two drawers underneath, but I think I prefer just using the lower lip of the drawer.)
If I do reproduction, I have more options, but I’m undecided about bin pull, vs drop pull, vs expected-handle-type-thing, and I’d be happier to let the right set of antique hardware make the decision for me… Either way, it needs to be right, because once we drill, it’s final.
2. Designing the drawers: DRAWER SLIDES.
Obviously, we are doing full extension, soft close… If we didn’t, the AKDCCE (Appropriate-Kitchen-Design-and-Correct-Cooking-Evaluators,) would have me forever banished to kitchen purgatory.
I might be doomed anyway, because we did not use Blum!
Blum is under-mount… which could have worked for the bottom drawers, but not the top, (without extra nonsense). So in the interest of keeping everything uniform, we did side-mounted drawer slides.
I tried to install some of the slide hardware myself so that I could explain the process to you… but sadly fortunately, I was unable to comprehend all 57,000 steps, so we can just skip this part.
I thought it would be fairly straightforward. But it is not. Just when you think it would be impossible to have any more steps… there are way more steps. And it turns out that you have to pay attention for longer than 15 seconds to gain proficiency.
If you haven’t already, go watch the piano deconstruction… it will give you an idea of how/why the front is accessible like this.
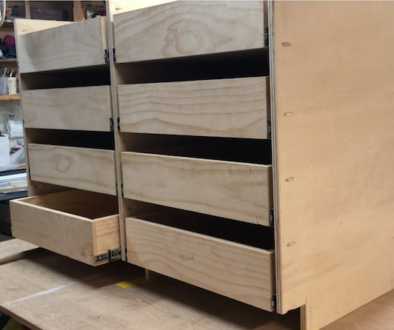
3. Storage inside the piano: DRAWERS.
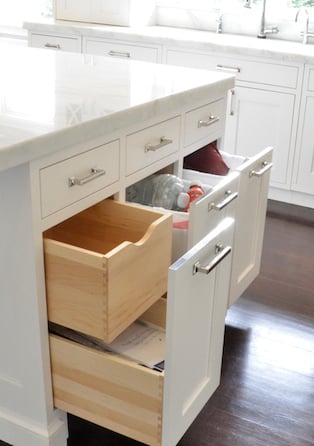
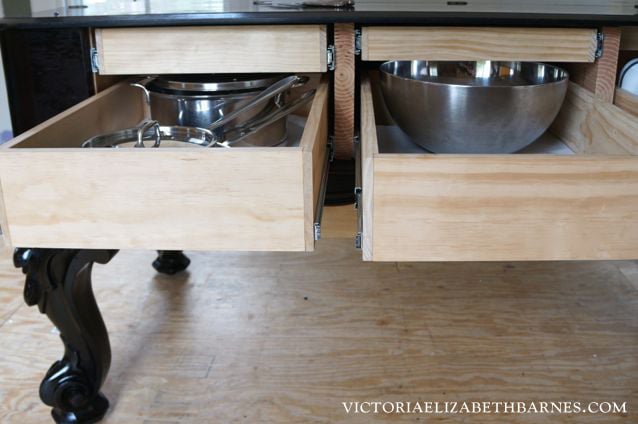
— Tall lower drawers (photo above).
The lower drawers are all the same height, but different depths– to accommodate the curved support at the back of the piano.
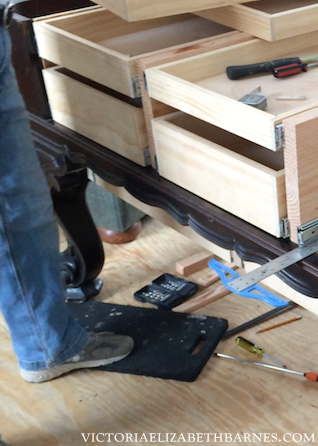
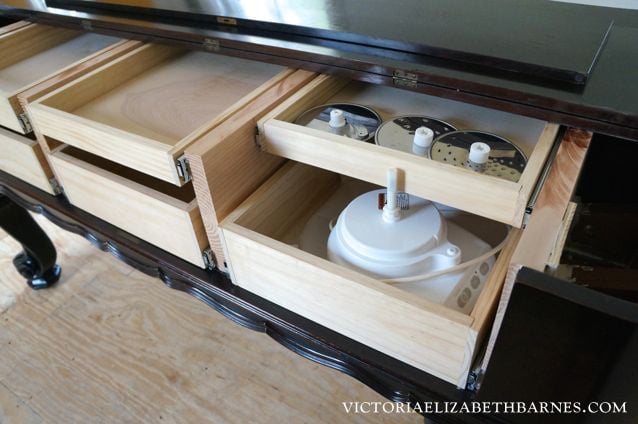
— Shallow upper drawers (photo below).
Because the height of the upper drawer dictates the usable-height of the lower drawer, Paul measured everything I plan to store in the lower drawers, and then allowed those measurements to determine the height of the upper drawers, so they are of varying heights.
2. Storage inside the piano: FOOD PROCESSOR.
The thing I am most excited about is a place to store the food processor that does not make me crazy.
The food processor is awkward and has a base that will not slide, no matter what… so getting it on a shelf or into a cabinet is such a giant pain that I am more likely to just leave it out.
UNTIL NOW.
This part I can take no credit for; it is entirely Paul’s design.
The drawer above the food processor is actually the same size as the other top-tier drawers. But Paul recessed it back a few inches to accommodate the food processor’s center post and minimize wasted space.
4. Drawers under the piano.
Paul built the entire under piece and installed it as one solid unit. The video explains this in about three seconds, so I’m skipping the written description.
The under-piano drawers are recessed on all four sides: more at the sides and back, less at the front. If your line of sight is up by your head, the three, non-operable sides are pretty much invisible.
If I lower the camera to waist level, you can see the drawers, especially at the front where they are closer to the front/edge/where you access them.
I think this is acceptable because even if you were super petite, you still wouldn’t see the front when you enter the kitchen. Plus, the distance you need to see the front from this particular angle isn’t happening once the island is aligned with wall cabinets.
You can see the drawers at the front, but not at the side, see?
These drawers still need to be covered.
Paul will use the piano top to camouflage the new wood once I am ready to let him cut into it… I haven’t yet had enough time to be certain I am not overlooking something.
This is an extra step necessitated by my own paranoia and indecision and general fear of commitment… It is a testament to the strength of these personality traits that Paul has adapted to them, rather than continue to fight a war he cannot win.
Now, video! This is the second half of putting drawers in the piano… the video of making the actual drawers is here.


July 7, 2015 @ 3:36 pm
Are no longer posting? Haven’t seen anything in over a month
July 22, 2015 @ 7:34 pm
does anyone know VEB and if she isn’t posting just because they are going to finish the whole kitchen and then do a big reveal or they are vacationing or something very not good has occurred and thus the end of posting. I don’t even know this couple and I feel as though a great neighbor, funny, talented, creative just moved away in the night and left everyone wondering Why? I sincerely hope they are both well and Miss Elvis too. I know she is very important to Virginia.
July 25, 2015 @ 3:02 am
Saw this and thought of you. too bad it is across the country. Granted, Paul is probable please about that!
http://charlesphillipsantiques.com/
July 30, 2015 @ 12:54 pm
I stumbled on your blog from a pin, and then of course set out to read the entire thing from the beginning. Go ahead and consider me DEVASTATED to have caught up. I have to wait for things in REAL TIME now? I now question my very existence.
August 5, 2015 @ 1:00 pm
Hello, I hope you are well. I am missing your blog and your updates. I love your humor and witty writing. I am looking forward to the time when you can come back.
August 8, 2015 @ 6:46 pm
I am serendipitously brand new to you but what providence for me as a sneak-away-messing-around-on-the-computer treat. One of the pieces we have in our foyer (really an entry but I am embracing my pretensions) is a m-u-c-h wee-er version of your piano island: my maternal great-grandfather evidently converted a bijou piano into his desk. After his death it lived in my maternal grandmother’s summer house, and when she died in the 1990s went into storage in my aunt’s winter house. I was the only of the cousins who wanted it, along with some hideously uncomfortable but fabulously over the top Brazilian dining chairs. I believe the chairs are for looking only, but my husband believes they are the perfect staging place for his empty reusable grocery bags … charming, but as he loves grocery shopping mum is the word. The piano desk has cubbies and a few drawers; needless to say the drawers aren’t fancy like yours. In all fairness, it was converted in the 1910s or 1920s. The children know it is as “the piano desk,” so even though they are young and small (though getting older and bigger) I know this piano desk will continue to be a family piece, and that makes me happy. So happy. And it makes me happy that you are doing something for your kitchen which will make you happy.
August 11, 2015 @ 8:09 am
So missing you!! Please tell us you, Paul and Elvis are just fantastically fine and enjoying the summer, and so hoping your kitchen and piano are still in progress, or did you find something so overly exciting that the piano has taken second place!!! Looking forward to your next post!!
August 13, 2015 @ 1:06 am
I am missing your posts as well–hoping you are enjoying a bit of a summer vacation and that we will see you soon!
August 18, 2015 @ 1:00 pm
have you checked with liz’s antique hardware? it’s not that hard to find sets of 3, 4, 5, 6, or 7 of antique hardware (bin pulls, drop pulls, bail pulls, knobs, you name it) that have been very carefully stripped of any paint in a way that doesn’t damage the patina. you can either make a trip to los angeles, and you will be in heaven (or bankrupt) when you visit (i promise you), or you can email them. they have well over a million pieces of antique hardware. if you’re going to go, plan to spend 4-6 hrs there each day for 3 or 4 consecutive days, and have a list and measurements and templates on hand. you will leave the happiest person alive b/c of what you will find! if you email, it’s best if you can narrow down the realm of styles you might be interested in by providing them a few pictures and say, hey, i’m looking for something in this vicinity. i’d email robert. he’s super knowledgeable about historic styles and eras and he’ll be able to sense the vibe you’re going for. you might also include a photo of the piano so he sees what it’ll be paired with. i’m sure he’ll be able to email you back with photos of about 3 or 4 options, easily, for 5 matching pieces (or, if you only need 3, he can very likely find you a very specific thing if you know exactly what you want). you might call and ask to speak to robert, so that you will endear him to you, and then you’re not just an anonymous emailer, and then you can correspond in part by email and in part by phone. you might want to mention to him what an enormous dork you are for all things old and historic and he will totally appreciate your enthusiasm. and trust me, robert is the one you want to speak to. aside from the owner (liz, who doesn’t take phone calls, she’s too busy running around the country buying up ALL the antique hardware that’s left to be found), robert is the most knowledgable. and he’s second to none of the employees in genuine sweetness. i used to work there, so i know these things. 😉
August 27, 2015 @ 11:28 am
Wow…what an interesting idea. Never would have thought to take a piece of furniture, especially a piano, and turn it into a kitchen island, with drawers no less. Great pictures showing the process. Thanks for sharing.
October 30, 2015 @ 12:53 am
Being pianists, my daughter and I, at first were appalled at this. It seemed macabre or something. Watching your progress, I have warmed to the project and now have a suggestion.
You should devise some way for piano music to play when the drawers open. Maybe your favorite songs or songs with food/cooking references?
Looking forward to the finished kitchen!
November 28, 2015 @ 1:17 pm
I love this idea. I have a purchased, freestanding kitchen island, but actually own a smaller piano case of the same type that belonged to my great great grandparents and was made into a desk years ago (did you know that making these pianos into other things actually has a history of it’s own!). Now I’m thinking one of these days I’ll repurpose this repurposed family piano into a kitchen island for my 1890 Victorian! One suggestion – when I saw the photo of the original piano top back on the case after the installation of the drawers, I realized how cool it would be to cut and finish a piece of dark marble or granite exactly like that original top (minus the hinge). It would beautifully mimic the original appearance while giving you more functionality. So if you haven’t already thought of that, I just had to leave the comment. Would look fantastic with light marble as countertops! Keep up the terrific work and inspiration! Thanks!
April 7, 2016 @ 12:01 pm
Love the piano island…very clever idea! Any pics of the completed island?
April 18, 2016 @ 5:56 pm
My mother has a Knabe grand piano just like this that her mother received as a wedding gift. I love, love, love your idea to make this an island. Do you have any pics of the completed project?
April 24, 2016 @ 5:39 pm
Victoria, I read one of your posts early this morning via a Facebook post… and I’m pretty sure I will never be the same! I laughed until I thought I would pee my pants! I too have a love for craigslist, yardsales, and antique stores…. and SARCASM!!! So I immediately tagged all of my girlfriends, so they could enjoy your post too… then went on to read post after post! I am only stopping now… because I have a family to cook for… laundry that needs folding… etc… but I will be back new friend!!!
May 22, 2016 @ 10:54 pm
Have you considered using the piano keys as the pulls?!