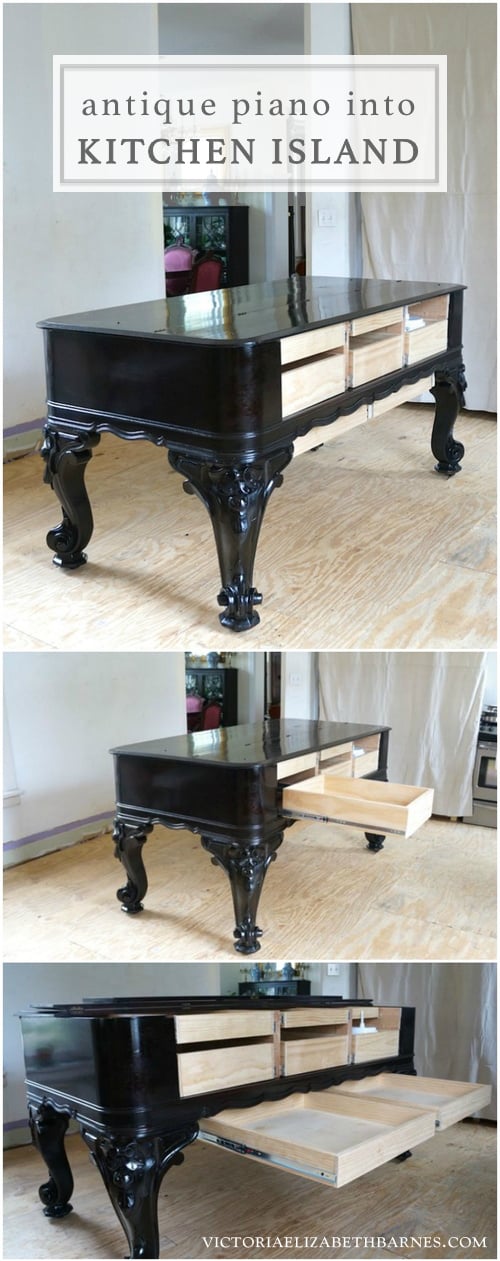
Piano into kitchen island– designing drawers and storage. *video*
if you’re new to the piano, start here! This is part 6… here is: part one, two, three, four, five, seven
If you don’t want to read all of my precious words, skip to the video at the end. It explains this entire post in fifty seconds.
BUILDING DRAWERS / PROJECT OVERVIEW:
1. Considering the piano’s structure.
2. Designing the drawers.
3. Storage inside the piano.
4. Storage under the piano.
1. Considering the piano’s structure.
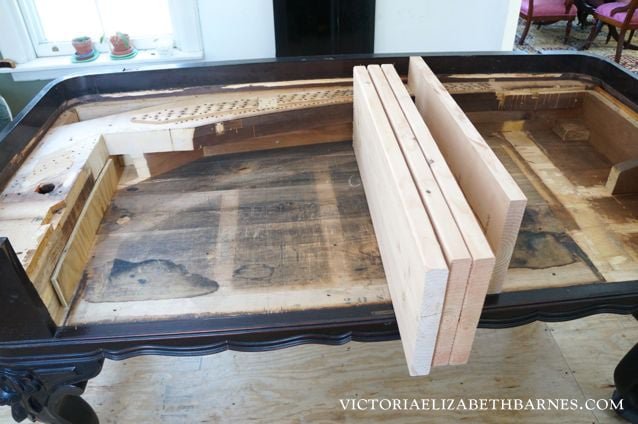
The piano is not just a flimsy shell… it has a thick, curved wood piece called the pinblock: it supported the harp and acted as an attachment for the strings.
In the photo below, in the left/back corner, (where the curve is most prominent,) we notched out one part to get the corner of a drawer a little bit further in.
Cutting the pinblock out entirely would give us more drawer space, but for what we want to do (top the piano with marble,) structurally, that curved piece is important.
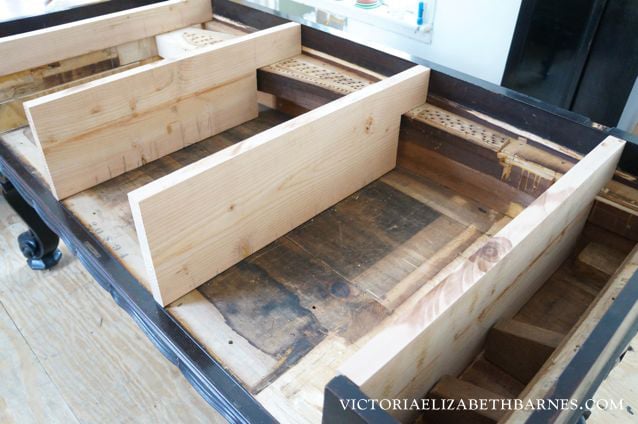
We are going to make the marble-supports perfectly flush with the very top edge of the piano (we want the original piano sides to appear to support the marble because I’m not sure I’ll want an overhang). We will leave the elevated pinblock and notch the marble-supports to sit on top.
These boards will also act as drawer dividers/drawer slide holders.
2. Designing the drawers: STORAGE.
We are going to have two tiers of drawers, but only one drawer face for each tier.
Weighing out functionality vs. appearance, three drawer-faces will look better than six, and the upper drawers will hold what is related to the lower drawers – attachments, etc. So I will be opening the lower drawer anyway.
Because I am trying to make decisions based on preserving the furniture-ness of the piano, I considered simply keeping the original keyboard cover (now-drawer-face) intact, and having the entire piece hinge up, or out, or somewhere, but every configuration I considered seemed like a lot of extra steps simply to open a drawer.
2. Designing the drawers: HARDWARE.
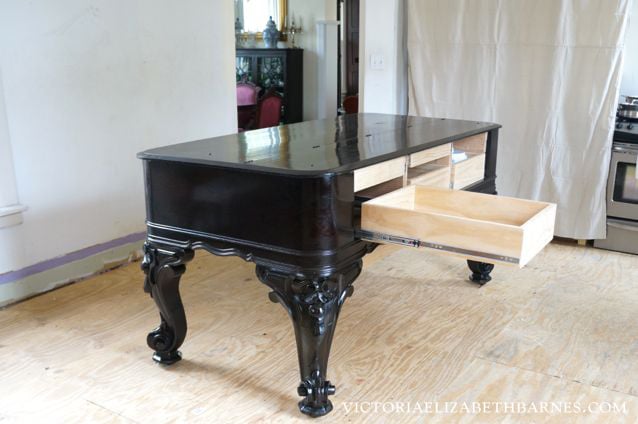
You can see that our drawers still need finished drawer fronts, which cannot be installed until I get handles, which I cannot buy until I find something I like.
I have been looking on eBay, and did the rounds of the salvage places, but anything I like is only a set of two. And I need at least three. (Or five, if we do the two drawers underneath, but I think I prefer just using the lower lip of the drawer.)
If I do reproduction, I have more options, but I’m undecided about bin pull, vs drop pull, vs expected-handle-type-thing, and I’d be happier to let the right set of antique hardware make the decision for me… Either way, it needs to be right, because once we drill, it’s final.
2. Designing the drawers: DRAWER SLIDES.
Obviously, we are doing full extension, soft close… If we didn’t, the AKDCCE (Appropriate-Kitchen-Design-and-Correct-Cooking-Evaluators,) would have me forever banished to kitchen purgatory.
I might be doomed anyway, because we did not use Blum!
Blum is under-mount… which could have worked for the bottom drawers, but not the top, (without extra nonsense). So in the interest of keeping everything uniform, we did side-mounted drawer slides.
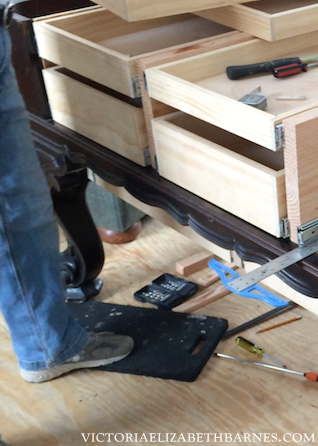
I tried to install some of the slide hardware myself so that I could explain the process to you… but sadly fortunately, I was unable to comprehend all 57,000 steps, so we can just skip this part.
I thought it would be fairly straightforward. But it is not. Just when you think it would be impossible to have any more steps… there are way more steps. And it turns out that you have to pay attention for longer than 15 seconds to gain proficiency.
If you haven’t already, go watch the piano deconstruction… it will give you an idea of how/why the front is accessible like this.
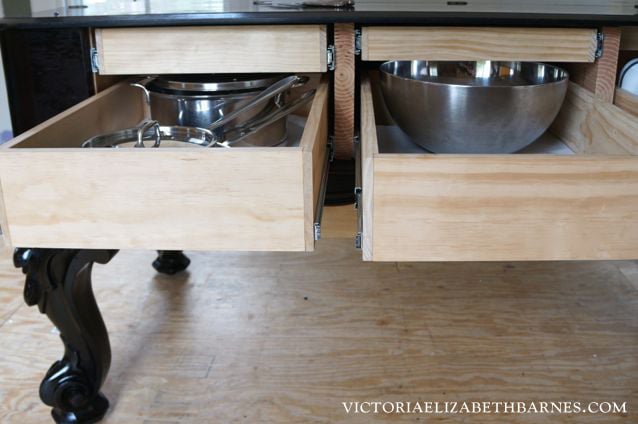
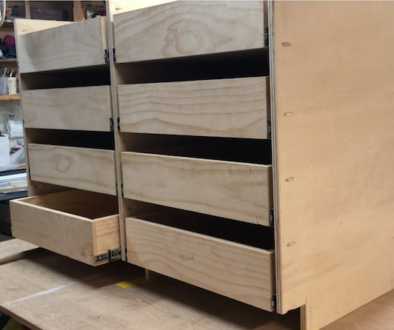
3. Storage inside the piano: DRAWERS.
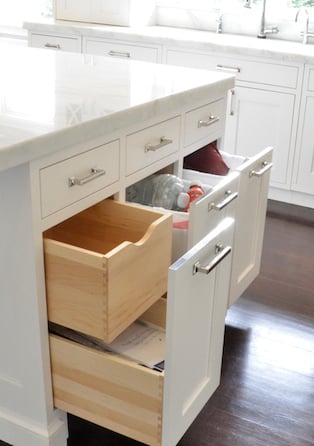
— Tall lower drawers (photo above).
The lower drawers are all the same height, but different depths– to accommodate the curved support at the back of the piano.
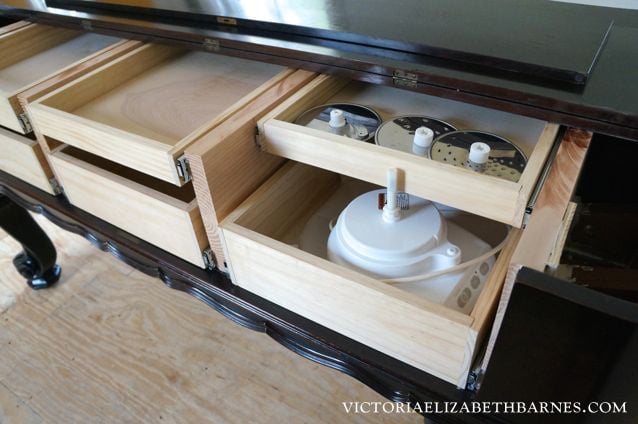
— Shallow upper drawers (photo below).
Because the height of the upper drawer dictates the usable-height of the lower drawer, Paul measured everything I plan to store in the lower drawers, and then allowed those measurements to determine the height of the upper drawers, so they are of varying heights.
2. Storage inside the piano: FOOD PROCESSOR.
The thing I am most excited about is a place to store the food processor that does not make me crazy.
The food processor is awkward and has a base that will not slide, no matter what… so getting it on a shelf or into a cabinet is such a giant pain that I am more likely to just leave it out.
UNTIL NOW.
This part I can take no credit for; it is entirely Paul’s design.
The drawer above the food processor is actually the same size as the other top-tier drawers. But Paul recessed it back a few inches to accommodate the food processor’s center post and minimize wasted space.
4. Drawers under the piano.
Paul built the entire under piece and installed it as one solid unit. The video explains this in about three seconds, so I’m skipping the written description.
The under-piano drawers are recessed on all four sides: more at the sides and back, less at the front. If your line of sight is up by your head, the three, non-operable sides are pretty much invisible.
If I lower the camera to waist level, you can see the drawers, especially at the front where they are closer to the front/edge/where you access them.
I think this is acceptable because even if you were super petite, you still wouldn’t see the front when you enter the kitchen. Plus, the distance you need to see the front from this particular angle isn’t happening once the island is aligned with wall cabinets.
You can see the drawers at the front, but not at the side, see?
These drawers still need to be covered.
Paul will use the piano top to camouflage the new wood once I am ready to let him cut into it… I haven’t yet had enough time to be certain I am not overlooking something.
This is an extra step necessitated by my own paranoia and indecision and general fear of commitment… It is a testament to the strength of these personality traits that Paul has adapted to them, rather than continue to fight a war he cannot win.
Now, video! This is the second half of putting drawers in the piano… the video of making the actual drawers is here.


May 27, 2015 @ 10:15 am
Elizabeth, this is genius!!! You are so lucky to have Paul to make your designs a reality! I can’t wait to see the final island, in place in your kitchen… I think this tops the “kitchen wall” of your dreams. It is so creative and different. P.S. I am on the lookout for a piano like this….MUST HAVE, MUST POSSESS!!
July 9, 2015 @ 11:35 am
You and Paul are probably trapped in a huge GFT of Antique Cupboards,Cabinets,Huge industrial Gas ranges and walk in restaurant sized Cooler/freezers but give us a heads up that otherwise All is Well! We your loyal followers are starting to Wonder? Or perhaps you have realized the futility of trying to satisfy the internets insatiable lust for New! Better! everything and have quietly retired to a paradisiacal Desert Island with a Booze Blender and a life time supply of Russian Vodka. If that is the case throw us one of those message bottles with the map coordinates. We will save you! or join you?
July 21, 2015 @ 2:04 pm
Agreed. I’m new to your blog, so went and read from the beginning and have enjoyed it so much. Hope you guys are doing okay!
May 27, 2015 @ 10:19 am
Good lord, your husband is some kind of engineering genius (due to your diligence, of course)…my husband can’t/won’t even change a light bulb or figure out how the thermostat works! Can’t wait to see the finished piano island…
May 27, 2015 @ 10:20 am
So in love with this piece and your blog and the way your brain works. My suggestion on the drawer handles – mix them up! I’m totally into mixing things up right now. I’ve been getting rid of all the matchy matchy stuff and buying what I love from thrift stores and salvage places or making it myself if I can. Now I get to look at many varieties of the things I love and the pick and choose is much less onerous and it’s interesting and colourful.
May 27, 2015 @ 10:23 am
Oh my this is turning out to be so beautiful! You have a super special guy there! Love reading your posts and following your home renovations, they make me smile!
May 27, 2015 @ 10:23 am
I kept referring back to my email to see if you had posted and I am now HAPPY! This is so impressive in displaying Pauls’ talents and your considerable contribution to the marvelous end result. Whoever eventually buys your home will never realize the enormous pure Genius, Blood ,sweat and probably tears that went into its restoration. I wonder if the rest of the Kitchen will pale in comparison to this utilitarian work of Art.
May 27, 2015 @ 11:01 am
No, NO!! No selling allowed!
May 27, 2015 @ 10:26 am
This is very neat! I hope your food processor never needs to be replaced!
May 27, 2015 @ 10:33 am
I had that thought too! But Paul could reset the upper drawer to accommodate a different style… or bring it forward to make it match the others (if someday they make a better food processor that is not a storage issue.)
June 2, 2015 @ 4:23 pm
I have the same food processor and the exact same issues with it. It lives on a shelf in a closet and there’s wasted space behind it and in front of it because once I set it down, it will not move. But what’s the alternative? Cutting things with a KNIFE?? On a BOARD?? I’d rather waste space.
June 3, 2015 @ 10:30 am
I love how you so blithely say, “Paul could reset the upper drawer . . .. ” What I especially love is that he so clearly COULD — and even better, WOULD! You married well, Victoria.
May 27, 2015 @ 10:27 am
I think the drawer storage is genius. Especially for the food processor, it’s heavy and awkward to move around. Once you cut the piano top to make the drawer fronts it’s going to be amazing. What style drawer pulls are you looking for? Ornate or simple? I have quite an assortment in my inventory of useful things and I am trying to imagine the finished look with different period styles… Are you a fan of Brass? I cannot wait to see the finished island. Aren’t you lucky that Paul is a carpenter and kitchen planner too?
May 27, 2015 @ 10:38 am
What about these:
https://www.etsy.com/listing/211267788/organ-ivory-disks-pulls-knobs-parts-old?ga_order=most_relevant&ga_search_type=all&ga_view_type=gallery&ga_search_query=antique%20piano%20parts&ref=sr_gallery_6
May 27, 2015 @ 12:52 pm
Love this idea!
May 27, 2015 @ 4:00 pm
Me too–highly suitable. They’d need retrofitting, but Paul could manage that. Cup pulls are great, but even ornate ones would look odd, IMO.
May 28, 2015 @ 11:02 am
I, too, love this idea. I was actually thinking about dark bronze with white (ivory on vintage) ceramic attachments.
May 27, 2015 @ 10:41 am
This is pretty darn neat, VEB!
(I also am unable to comprehend drawer slides. I know they are absolutely indispensable for work drawers, but the idea of installing them myself curdles my blood. My son is a cabinet maker, and whenever I ask him about retro-fitting the drawers in the storage unit in my workroom [built-in cabinets from the 60s, I think] with slides, he gets a weird look on his face and changes the subject. But I NEED those drawers to open and close easier! I will gladly give up inches off the storage inside to make them slide!)
Really, really amazing work in the kitchen. I’m a little bit envious and a lot happy for you that your island dreams are coming true!
May 27, 2015 @ 10:41 am
Absolutely beautiful work. I vote for no drawer pulls. Just recess the drawer bottoms, it will preserve the original cabinet design.
May 27, 2015 @ 10:42 am
Enough with the lies, I do not look fantastic. But the island does. And has anyone offered to HIRE you as a kitchen genius on the strength of this gorgeousness? Not that I am offering but seriously, you are so good at cabinets you should be in the White House or something. Secretary of State for Kitchen Governance. Do they run the AKDCCE?
May 27, 2015 @ 10:42 am
Wow! I dream of such talent!
You are a visionary! Paul is as meticulous in his planning and building!
I wait with bated breath for this kitchen evolve!
May 27, 2015 @ 10:50 am
I was at an antique store in Northern California last week and ran across a similar piano. I was so excited and thought “Now I can have an island just like Victoria’s!” My husband looked at the $6000 price tag and said…”Who’s Victoria and why would you spend $6000 on a kitchen island?”. I showed the store owner your video and tried to convince her that they were just giving these things away back East but she didn’t bite…sigh….
May 27, 2015 @ 10:51 am
Paul is amazing! I think he can do ANYTHING! You are one lucky woman!
May 27, 2015 @ 10:52 am
No matter how many amazing treasures you find on Craigslist, never under estimate the value of finding and marrying PAUL. 🙂
May 27, 2015 @ 10:55 am
Thousands of women are asking if Paul had any brothers as you read this…. 😉
May 27, 2015 @ 11:00 am
This is pure genius. Major kudos to you and Paul. ESPECIALLY regarding the food processor storage. I might use mine if it were so accessible. 🙂
Brilliant work!! Thank you for sharing all the dirty details with us.
May 27, 2015 @ 11:02 am
Genius! This is beyond spectacular. Oh, and by the way, on the food processor not sliding…I have the exact same machine and Martha had a great cure for the not sliding part…you attached the felt pads that you put on chair legs (self adhesive). They come in a variety of sizes and they work great. You won’t need to worry about that now, but just so you know! 🙂
xo,
Karen
May 27, 2015 @ 11:06 am
Unobtrusive black knobs, so drawer-opening hardware doesn’t detract from the overall impression of your piano/island.
May 27, 2015 @ 11:12 am
Your husband is a SAINT!!!! Kudos to both of you for a truly unique kitchen island.