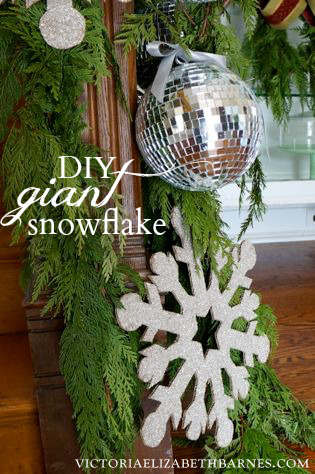
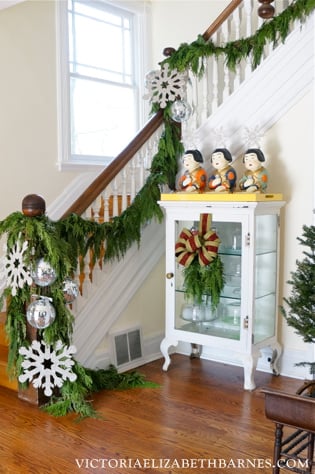
DIY Giant Glitter Snowflakes
take the full holiday house tour here!
After I showed you part-one of my Christmas decorations, some of you said – wow, you really got your house cleaned up since you showed us the decorating war zone.
And I would like to say – Um. No. I have not. What I DID do was shove all of the piles of crap out of the picture.
I need one of those hotel-bellman trolleys. So I can just load it up and wheel all the junk out of whatever room I want to impress you with.
I guess I could also throw some of this stuff away, but for some reason the bellman trolley seems more practical.
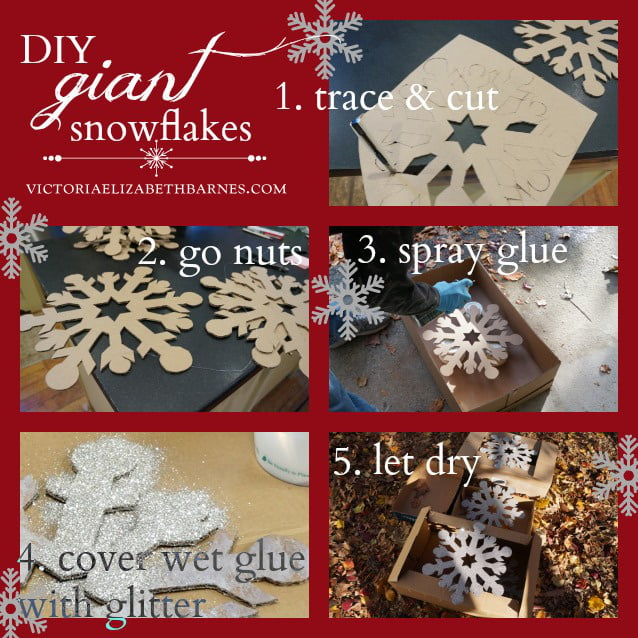
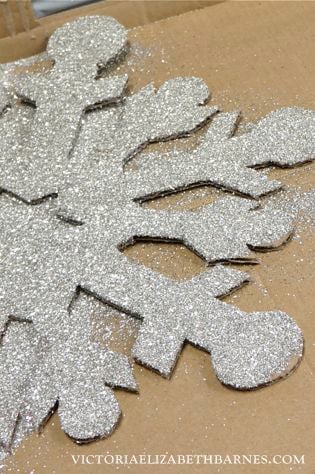
The most tedious part is cutting out the snowflakes… I did it at the edge of the kitchen island. That way I could saw down through the cardboard with a razor knife.
TIP: If you do this on your husband’s free time, you will be amazed at how much faster it goes.
I used cardboard shipping boxes as the base for my snowflakes… But it is possible that if you are not hopped up on one pound of pure Bolivian cocaine German glass glitter that you will not want to stand at your kitchen island for an hour, sawing at boxes like a maniac.
It is also possible that you do not have my gift of foresight—where you hoard boxes for some yet-to-be-conceived project.
I did try to find some precut options, and these looked pretty good. They are large enough, and I did like the shapes, but I could not be sure about the weight of the paper… I do think this would work with cardstock, but I really don’t know how they would hold up over time.
Besides, I am a blogger. I am required to think of uselessly-intense, idiotic projects… Frankly, I am cutting corners by using pre-made cardboard.
I really should have made the cardboard myself, out of recycled leaves that I chewed into paste. Then I could have created a Pinterest-worthy, annotated-image promoting my DIY artisanal cardboard.

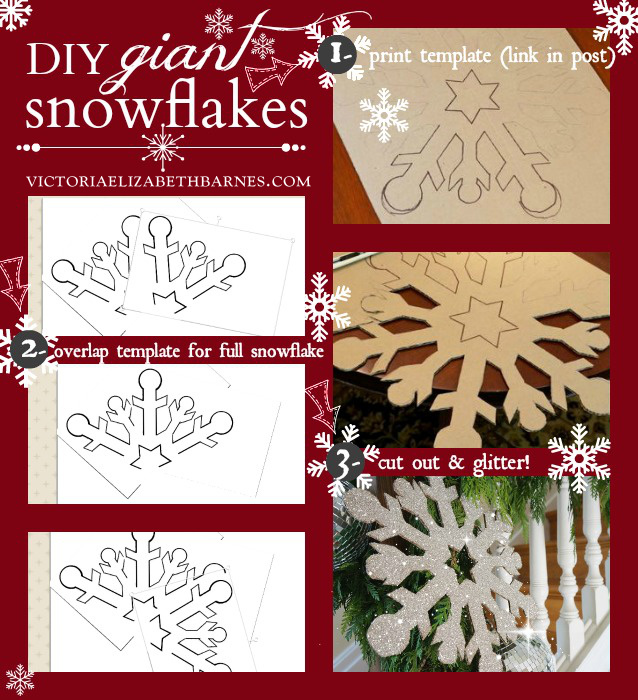
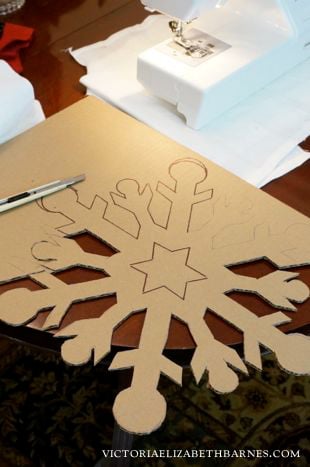
My snowflakes are 16 inches wide, but I had to figure out how to give you a template that you can print on regular-sized paper. The best option I came up with was to give you a section of snowflake… When you print it, it should almost fill the paper.
Once you print it out, (right click & open in new tab) you will need to make the whole template.
I think it will work best if you print out the section and glue it to a piece of cardboard before cutting it out… Then you will have a very sturdy template that you can trace repeatedly.
What you’ll need:
- cardboard or heavy card stock
- small sharp knife
- glitter (I used German glass glitter
which I think gives a nicer “silver” but it WILL tarnish over time)
- glue that is not water-based (I used spray glue) you can’t skimp on the glue or you will not get good coverage with the glitter, but at the same time you do not want the glue to take forever to dry. I let them set overnight for good measure.

see all my holiday decorating ideas
I will love you EVEN MORE… If you share me with your friends!

November 10, 2017 @ 12:58 pm
You are hysterical. Thank you for that.
December 17, 2017 @ 6:22 pm
You should have a tv show. You are sooooooo funny. Please get on HGTV. Please. The world needs you!