Whoever said less is more… clearly never had enough more.
If you have been reading me for a while, you remember my giant pearl necklace of invincibility.
The way it works is that it is so giant and irritating, that the entire time you are wearing it you are distracted from anything that might give you anxiety, intimidate you, or make you feel less-than.
You will never wonder if people are judging you or looking at you weird, because they are.
But you get to decide what for.

A few times a month, someone with similar beat-of-own-drum-in-head-issues emails me and asks where she can acquire her own suit of armor… but I got the pearls years ago at a store that was going out of business and I’ve never seen anything that large again, or I would have bought more so that I could be extra invincible, (and make matching earrings.)
But on a recent trip to the craft store, it was revealed to me that what I thought were giant pearls… are actually VASE FILLER.
I have been wearing a wedding reception from 1980 around my neck.
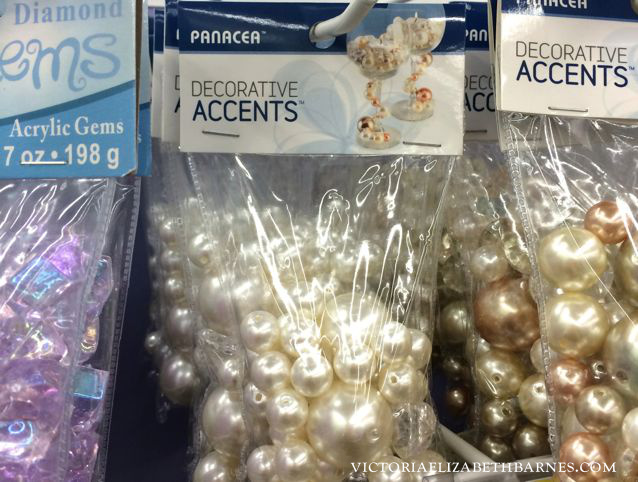
I went and got a cart because:
A— you can never have too much vase filler.
B—much like Diana Vreeland, I am a fashion visionary.
C—the raccoon shrieked and clapped and clawed at my brain insisting: BUY THEM ALL.
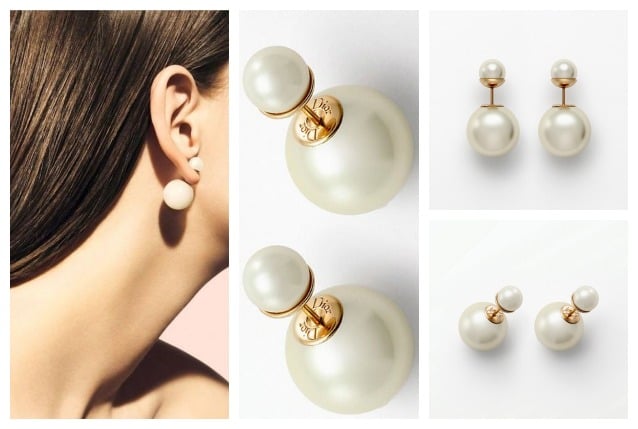
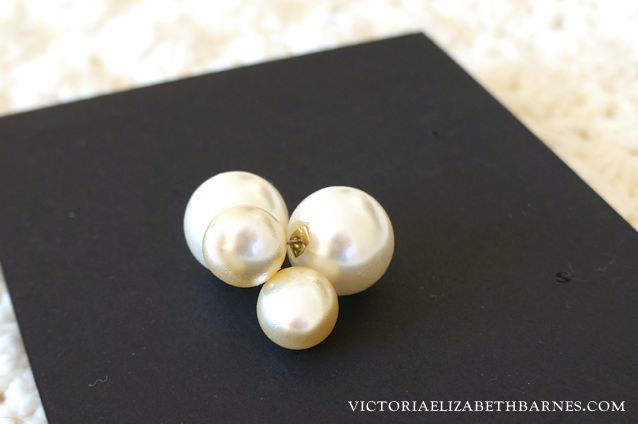
Then I ran home and got busy… I wanted these. But. You know. BIGGER.
You’ll need:
- a pair of pearl studs
- earring backs
- pearl beads that are larger than the earrings
If you buy beads at your craft store, don’t forget to look online for a coupon… they can scan it right off your phone in the store. If you buy them online, be sure you don’t get the mixed colors. (Unless you’re fancy like that.)
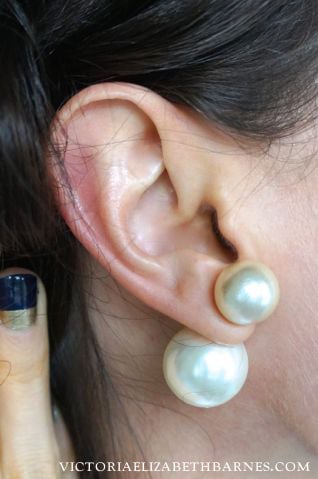
If you are wondering why I didn’t use the largest bead? (I too am wondering this.) At the time, proportion between the back and front seemed important and the pearl studs I had on hand balanced out best with the middle-size bead… If I can find some larger studs, I’ll make another set. (I say that casually, as though I have not spent the last 48 hours doing nothing but searching fruitlessly for EXTRA GIANT pearl studs… because, let’s be honest– these really aren’t big enough.)

I googled DIY Dior double-pearl earrings (because you do not have to figure out anything for yourself anymore,) and the most popular tutorial involves just gluing a rubber earring-back into the hole.
I tried that first, but all of the tutorials used a fairly small pearl bead… I’m using a larger size and the rubber back didn’t feel secure. It held, but I kept fiddling with them and pushing them tighter because I could feel the connection loosening up.
Luckily I live with someone who is legally obligated to resolve these sorts of issues for me.
Paul has actually changed my definition of what a real man is: someone who is able to INSTANTLY transform plastic beads into EXACTLY what I want at this very moment… LIKE MAGIC. (Which is my favorite way to accomplish anything.)
If you cannot turn giant plastic beads into earrings, I am sorry to say, you are no man at all.
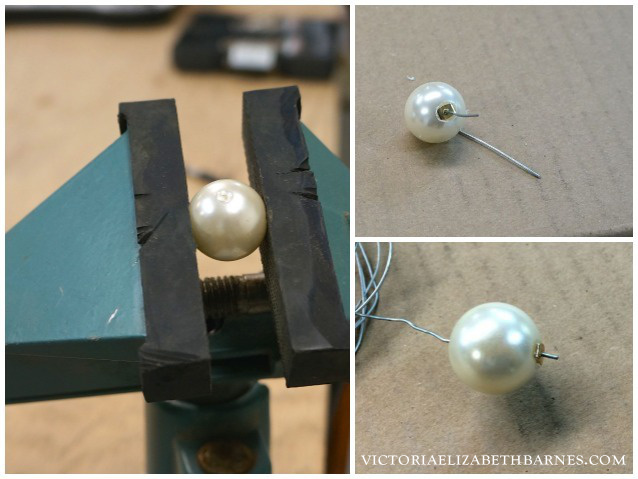
Paul widened the hole with a small Dremel tip… just enough to epoxy in a metal earring-back. (If you do it this way, be sure you run a wire through to clear away any glue blocking the connection.) This felt a lot more secure– I can feel the earring-post clip into the backing and I have to tug pretty hard to separate the two.
While I was watching Paul drill out giant plastic pearl vase filler for no reason other than my immediate gratification, I started to have anxiety… it was one of those times when you are reminded that this person in front of you is THE ONLY PERSON for you. And that they can never leave you. Ever.
Paul is going to have to live to be 103, because he has ruined me for anyone else.
Go, right NOW and thank your partner for whatever they do for you that is your version of earrings. Maybe it involves their pick up truck. Or unloading the dishwasher. Or their willingness to shove a 14-foot quarterboard-nautical-collectors-item through the open windows of a four-door sedan and drive home in a rain storm. (I didn’t make that up– someone shared it in the fb comments and is 100% why I love you people.)
other items of fashionable craftiness to impress you: here, here


November 30, 2014 @ 8:16 am
You’re the best victoriaelizabethbarnes! Thanks for sharing this diy idea. Now, lemme see if my husband can do this for me.
December 22, 2014 @ 1:33 pm
oh I LOVE these!! they look FABULOUS dahling!! 😀
January 27, 2017 @ 11:28 am
So… since you’re drilling the pearls already, all you need is a smaller size vase filler bead, some 18 or 20g gold, gold filled or sterling silver full hard wire (RioGrande.com) as budget mandates and some modern bead caps for whatever size you need (Gold filled here: https://goo.gl/ZgkoVZ). Partially drill the front pearl, add the bead cap and glue in the wire ‘post’. A nail file will work well for taking the hard edge off the exposed post end. I’m going to try this myself 🙂 Thanks!